WorldBuilding 101
World Building 101
Introduction
Ok first a little bit on why I am writing this document for those who may or may not be interested. I've been modding various games now for about 8-9 years. Starting back with Q2 and HL, then finally moving into RPGs when Morrowind and NWN came out. One of my biggest pet peeves about the various modding communities (and this isn't anything against any of their members just the way things pan out) is no one ever really bothers to do a full walkthrough from beginning to end on world creation, even those that are doing heavy TCs that you would think could capture a few screen shots here and there. Now that being said I am just as guilty as any of them for doing that and I decided with Oblivion to do something a little different. I am currently working on a total conversion mod, as it is, for a game world that I've been running in my RM PnP games for about the past 10 years. So I figured what I would do would simply take screenshots as I went and figured things out to share them with others who may be interested in doing their own. And if your not I'm always looking for help, doing a TC as one person is alot harder than most would think, so just drop a message to Tashan on the official Oblivion forums if interested.
Now for a wee bit of a note on how I do things. I never just use the tools provided. I'm a 31 year old married man, I have a wife, kids, house, and responsibilities. Thus I tend to look for the shortest way to the best results in my hobbies. That doesn't mean I try to cut corners, just that if I can find an easy or automated way to do something I will spend tons of time trying to find it before relenting and doing like most everyone else. That said we are giong to be needing a few extra tools outside of the TESCS which I will list in the interim. By the way, I also tend to be a bit unprofessional in the way I write. I figure your here to learn, I'm here to share, might as well make it as enjoyable as possible, while keeping it short and hopefully preventing it from getting too dry. Now on to the meat of why you came here.
What we will be covering:
This is going to be the first part in a series of tutorials. I have no interest of sitting at a computer for hours on end until I get everything done and release it at once, and I figure you, the reader, would get quite bored with it anyways. So I am going to attempt to break these tutorials up into logical progressions. Between their being made and published I encourage you to take the time and experiment with things, if you find something you think others might benefit from then by all means message me with it and I'll try it out and see if it can't be put into a future article.
For today's article we are going to be discussing the creation of landmass within the gameworld of Oblivion. This is going to be an area completely seperate from Cyrodill and I will also include the scripts and instruction necessary for you to put a new start within the gameworld and bypass the usual tutorial which comes from starting a new character. Note we will be using Oblivion.esm. There are others who are FAR more skilled than I am at converting an ESP to an ESM and vice-versa; however, I find it nice having a source which has every tool, quest, npc, spell, etc. already contained within it so we can pick and choose what we want instead of spending hours trying to hack out a blank esm/esp that has everything one might need in it. Also I have noticed zero slow downs from using an esp alongside the standard esm for new world creation.
By the time you finish with this article you should have a completely new world/continent within your game. It will not be textured with anything more the the default textures, and you will not have regions, trees, rocks, or grass yet but you will have the start to your world and future tutorials will be covering those aspects.
What we will need:
Ok this is where things get a little annoying. For this tutorial you are going to need four items which are as follows:
- 1. TESIV:Oblivion
- 2. TESCS
- 3. A graphics editing program. I use Photoshop, and this tutorial will be from that perspective. There are other apps but I will not be covering them here nor do I use them myself so you are on your own figuring those out. They MUST be able to save and open 16 bit greyscale images in order to work.
- 4. A handy utility called Fractal World Explorer. You can get this as part of a purchase of Fractal Mapper from nbos or you can get a trial version which will do everything we need it to do by downloading the trial version of AstroSynthesis which is available off of the same site. I HIGHLY suggest buying the full version of Fractal Mapper as it is a handy tool to have when doing fantasy worlds and modding in this kind of environment. Plus if something blows up while you work in FWE, without the save function you are pretty much out of luck.
I also suggest reading the following prior to doing these tutorials. They cover alot of basic use of the TESCS and the premise behind my fractal land mass generation which we will be using. I take for granted that you are already familier with the basics so if you aren't you may be lost.
Part 1: In the Beginning
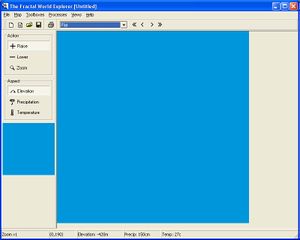
Ok first thing is first. Before we can hop right into the TESCS and start building our grand new world we first need to create the land. This is where the lazy man comes out in me. Open Fractal World Explorer up and let's get generating.
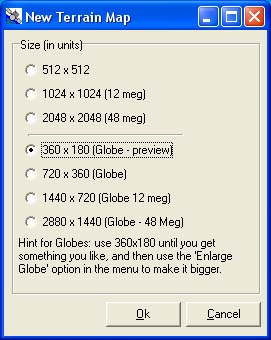
First you want to Press CTL-D which will bring up your world creation dialog box.
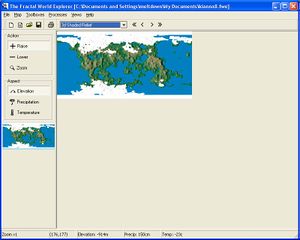
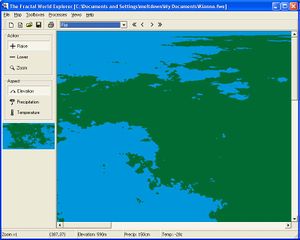
Here you want to select 360x180 (globe preview) option, and this is the ONLY complete world creation option you ever want to use in FWE unless you like waiting 3-15 minutes to get a world generated. Go ahead and click OK now and wait a few seconds for it to generate a map. Once that comes up, if it is something you like, go ahead and hit File->Save or continue on to the next step if you are using the free version. Here is what I am going to be using for my world.
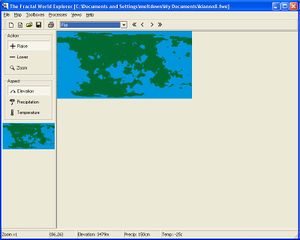
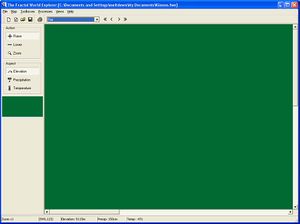
It doesn't look like much but in a few minutes it will look ALOT better. Ok next, it is a wee bit too small for our use so we have to do a bit of a manipulation to get it to more the size we want. First you should see a pull down box onthe toolbar that currently says "3D Shaded Relief" you want to click that box and select the option of "Flat". Reason being we are going to be doubling the size of our map and if we keep it in 3D shaded it takes alot longer as it keeps updating the rendered 3D image as well as the map information. So hit Flat and you should get something green and ugly like this:
Now that that is done you will want to click the Map pulldown menu and select the last option Enlarge Globe (x2). Wait a few seconds and your map will jump up in size. Once that is done you need to enlarge it two more times before moving on so we get a properly sized image. It basically takes the 360x180 generated map and by the end it will be 2880x1440. Note once you get started on the second and third enlarge, unless you have a uber computer, you might as well step away from the keyboard as it still can take quite a few minutes to blow it up. You'll know you are done when you click the Map pull down and the Enlarge Globe (x2) option is greyed out. You should also have something that looks like this in your render window:
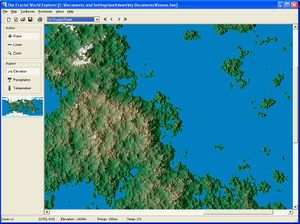
Ok if you want go ahead and switch back to the 3D Shaded Relief on the toolbar and note how your world looks. Should be looking a little better than it was, but it is still probably looking a bit-blah. We'll on to fixing that. Switch back to Flat mode as the next portion is going to kill your processor and especially so in 3D Shaded Relief and let's move on to the next part.
What we need to do is "weather" our terrain a bit in order to get it looking more realistic. This is also going to add in some plains and hills. What you want is the forth menu over entitled processes. Click on that and the first option down says Water Erosion. Go ahead and highlight it so that the pop out box comes up and select one of the options there, I personally use 500,000 years but then I like more hilly terrain with occasional flat spots. 1,000,000 years will give you a TON of plains. Fortunatly you can go in 100,000 year increments as well to get something exactly to your liking. I suggest those who have the full FWE save here before doing any processes, and make additional new saves after each process you do so you can get it to your liking better. I personally have always preferred 500,000 as stated earlier so that is what I used. Ending up with a result of something like so...
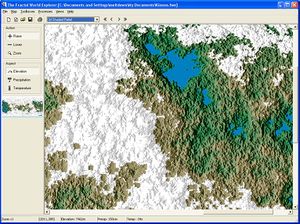
Now that that is done let's go ahead and soften the terrain up a bit and go to processes and this time select Wind Erosion. I myself use 1,000,000 years though you can use what you like. Once that is done come back here and we'll continue on to the last step with the FWE.
Done? Great, let move on to our final step before throwing it out into something closer to what Oblivion can read. Ok there is an issue with how FWE exports it's maps to binaries. That being it only exports out those areas above sea level, see level being at 0 units. Oblivion on the other hand does not start it's landmass until about 4200 units up. So now we have to lower sea level a bit. Before we do, make sure you are in 3D Shaded Relief mode, and then go ahead and export out your map as a graphic under the File->Export as Graphic menu. This will give you a nice pretty BMP or JPG to use for reference once we get into the photo editing portion, or a desktop wallpaper, whatever. Now, switch back to flat mode and go under your processes menu again. At the bottom of the menu you will see the option Lower Sea Level. What we need to do is lower it by 4200 meters, so lower it by 1000 4 times and then by 100 twice, you should end up with something like this.
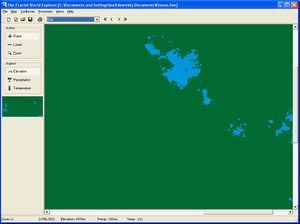
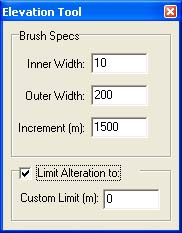
If you notice there are still some locations with water. Make sure you are in Flat mode because we have to get rid of these pools before finally exporting to a binary file. TESCS sees those as highs and it does wonky things to your heightmap when it is imported in. Now that you are in Flat mode you want to go to Toolboxes->Elevation Toolbox on your top menu bar. It should come up looking like this, except the settings will be different. Set your settings to the same as mine and then click Ok.
What these settings do is prevent from raising the elevation above 0m (which is where we want the absolute bottom of the depressions to be, no lower) and also gives you a pretty good brush size and a fast change setting so it should only take a few minutes to finish up our work here. With that done make sure the + Raise action button on the left hand side of the FWE window is seleveted and go to painting. Just hold down the left mouse button and drag over yoru remaining bodies of water. You don't have to worry about being neat as it won't alter anything already at 0m or higher. So just make sure there is no blue on the map and we are good to go. It should look all green like so....
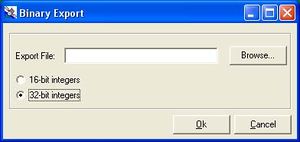
Ok time to get out of this program and on the the next third of our project. If you have the full version I HIGHLY suggest you save one more copy before we go on to the exporting portion. Generally I have ~5-7 copies of any world I am working on to make sure if something is screwed up somewhere I can go back and touch up from a specific point. But that is just me. Once that is done you need to click your File->Export to Binary menu option to get the export window up which will look like this.
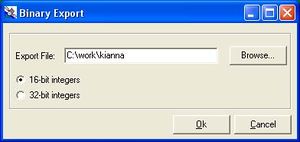
Here you want to hit browse and put your file into a working directory. Unlike my previous tutorial we still have a bit of work to do to it before it is ready for primetime so you do NOT want to put it in the heightfield Oblivion directory just yet. I suggest putting it in the same place as the reference picture you exported out earlier. So browse out to that directory, enter the file name you want including the .raw extension, and click ok on the Browse window to get back to the Binary Export dialog box where you should now have your path at, and then make sure you select the 16-bit integers option before clicking OK. So everything SHOULD look something like this:
Once you hit OK it will crank for a bit and then return you back to the render window. Go ahead now and put FWE away as we won't be needing it anymore.
Part 2: 1/3 of the way done
Now that we have it out in a format Oblivion and our editing program will read it is time to do some work to get it to the right scale for Oblivion to read properly. Oblivion is limited to ONLY pulling in 1024x1024 maps. This really isn't that big of a deal until you consider our current heightmap is 2880x1440 which means we have some work to do. We are actually going to be making several height maps (16 to be exact) which will end up creating a world of 128x128 cells (or 16,384 total exterior cells) when all is said and done. Now as stated before I use Photoshop and everything will be done from a Photoshop perspective; however, the way it works is the same for any editing software you just have to find where the commands and options are for your particular package.
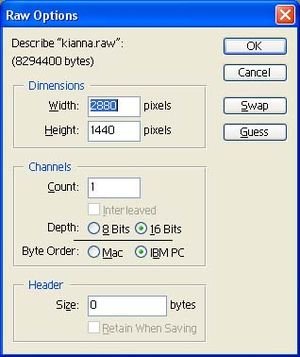
So go ahead and open your graphics program up, and open up both the raw file you made and the bmp/jpg you exported earlier for reference. When you go to open your RAW file it should pop up a dialog box looking something like this:
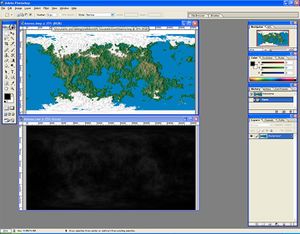
Yes those are the options you want to have entered in there as well. Make sure they are selected and hit OK and it should open up your file. So you should be looking at something like this.
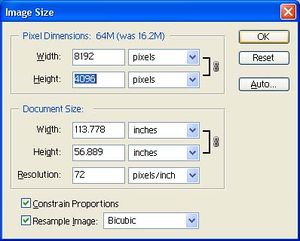
Now it is time for some resizing, select the window with the raw file and go up to Image->Image Resize menu option which will give you a window for telling it how you want it resized. You want to make sure constrain proportions is set to on, and the second selection box next to height is set to Pixels. Now in the actual height number field you want to enter 4096 which will gives us a graphic measuring 8192x4096 so your box should look like this:
Now do the same for your guide picture you also opened, that way you have 2 pictures of the same size. At this point your probably going to have to change your zoom level on your windows so you can see all of both pictures. at 1280x1024 I use a magnification of about 8.21%. On Photoshop you can adjust the magnification on the mavigator tab which is at the top of the right hand toolbar by default, just under the preview picture with a slider. Note make sure you have plenty of HD space because the RAW file alone is 65 megs.
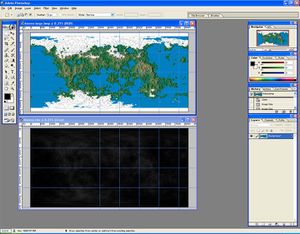
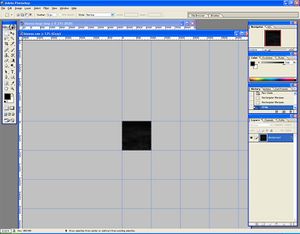
Ok now comnes time when everyone has to figure things out on their own to a degree. What you need to do is find a 4096x4096 space on your map that you want to see in game and outline it. Here is how I start with Photoshop. I go to View->Snap To and make sure Guides is set to checked. I then go to View->New Guide and add 4 horizontal guides. One at 0, 1024, 2048, 3072, and 4096 on both maps. Those make up our 4 Y axis segments. Then for the X-Axis I look at my guide picture to see what areas I want to include in the mod. In this case I am starting with the port city of Northport which resides on the NE coast of the continent. That being determined I go to the furthest east portion of the continent and drop a guide there (at about 7700 for me) on both graphics. If the Guide is not situated exactly right you can undo and redo it. Then I just step back by increments of 1024 for 4 more guides, if I was going from the west I'd step forward by that many increments. My end result looks like this.
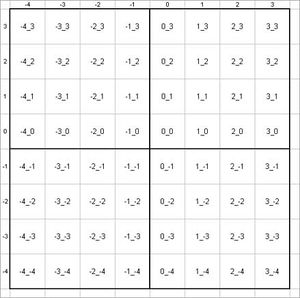
Now I could keep going back west and actually get most of the world ingame, and I probably well but in the interest of time I'm just going to do it the simple way. Now here is where the repititious tedium begins. Photoshop itself cannot copy and paste from a 16-bit greyscale image. So we get to learn the joys of selecting and cropping. Before we do though I think it is very important to refer everyone to this picture.
Go ahead and click through it as that tells you what your files MUST be named. we are doing a 4x4 grid so we will be using from -2_1 to 1_-2. Remember when I said I go in to view and verify my snap is set to gridlines? This is why. What we are going to do is choose the select tool and drag over the NW corner box with it. At this point you are probably going to need to enlarge the window holding your raw file in order to see the select box. Go ahead and do this as we really don't need the other graphic any longer. Once you have what is going to make up your NW corner selected you now need to crop your image. In photoshop this is done under Image crop. And should leave you with something looking like so.
Once that is done you need to select File->Save As and save it as a RAW file type (Photoshop defaults to psd so make sure you check that) named -2_1.raw. When you hit OK a Raw options box will pop up asking some settings information. Make absolutly sure the header is set to 0 and the Byte Order is set to IBM PC. Once that is done, your program may or may not popup a warning about being unable to save print settings and such, that is fine just OK through them. Now that the file is saved go to Edit->Undo (or step backwards in the case of Photoshop) to undo the cropping and proceed to the next square over, naming this one -1_1 when you go to save it. I'm not going to walk you through every one of them as it should be pretty self evident. I suggest you printout or writeout the grid shown above for your reference, and just remember that everything comes off of 0_0 and it must be included whenever you do future projects. Once done saving them come back here for the final process. Actually putting them into the game world.
Part 3: Almost Home
Finally... I take it you got all of that mindnumbing crop and save work done. Well now it is time for the fun part to put it into the game and see it work. Go ahead and minimise your Photoshop window now, or if you feel really confident you can close it out, and browse out to where you saved your raw files. What you want is to select the 16 raw files we just saved and copy them to your <wherever you installed Oblivion>\Data\HeightField directory. You may have to create it if you haven't played with the heightmap editor in TESCS. Once that is done pop open TESCS and we'll get started. Also note things are going to get a bit slower from here on out. Main reason being when you start importing height maps into the TESCS you drastically slow it down. To the point where at times it will take 5-10 minutes to open up your final ESP and as long to save it. Get used to CTL-ALT-DEL as well because that is the only way you are shutting it down in a timely fashion, and I suggest whenever you do finally shut it down you reboot your system as it doesn't free memory to well. That being said let's move on. Open up TESCS, select data and choose ONLY the Oblivion.esm file. You know thep procedure... Wait awhile and you'll finally be ready to work.
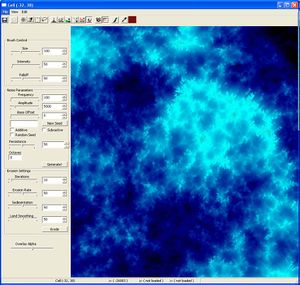
First step, same as in my Fractal Terrain tutorial linked to at the top of this tutorial, create a new world space (for those who bypassed my previous tutorial it is under World->World Spaces, right click on the left pane, select new and name your world something). You can leave everything to default, but you might want to uncheck small world. Personally I haven't looked into what it does, but being off doesn't "seem" to break anything. Now once your new world space is created OK out of that window and click the heightmap editor button (looks like a globe, 9th button over on the toolbar), and select your new world in the drop down box. It'll click for a bit and then you'll see your terrain pop up in the window and it should look like this.
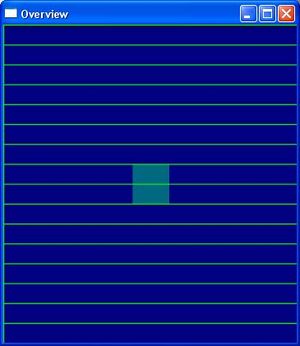
Actually you'll only see the central four areas. Thanks to Seven05 on the forums I discovered that this is caused by the heightmap editor only allowing you to edit one quadrant at a time. To get around this, once everything is loaded in the heightmap editor hit View->Regenerate Overview. It will pop up a warning about taking a while jsut click through it. Once everything starts responding again click the Overview window and it should pop up with some greenlines on a blue background with 4 light green boxes in the center. This is the quadrant you are looking at right now.
Ok now you need to click on the line dividing the quadrant in half at the far right of the light green box. This will jump you over once space right and will import in those files. It will pop up a box asking about saving the current texture, hit Yes and let it crank. It should also update your overview pick with the textures as well. Click on the new right edge of the green box again to go to the next set (which should have a texture on half the editing window and a dark blue border on the other)., this is the end of this side. What you need to do is go around the central portion of the map until you have filled in all of your textured areas. Note: The Overview can do some funky things, don't trust that what it shows is what is REALLY there (i've had it drop textures completely out of the overview, move them to places I knew they weren't and could verify they weren't in the height map editor). Long as it looks resonably close and you verify that the right things are in the right places (should be fairly easy to tell) in the editor itself you are fine.
Now it's time to fix the land... If you happened to save it in the heighteditor and jump to the world you created in the cell viewer you will notice alot of stair stepping and some strange anomalies. That is ok, we are going to fix that now. In the Heightmap editor you want to go to the Erosion settings on the left hand side. I just leave mine default as we have already done MOST of the work with FWE, this is just for the purpose of smoothing it out a bit for TESCS. So click in the middle of each of your four corner quadrants and hit the erode button, everytime you move quadrants it will ask if you want to save the texture, always say yes. There is actually no need to overlap as you are going to have problems regardless with where the erosion quadrants meet. HOWEVER doing it this way makes it so that the problems occur ONLY on the central AXIS rather than out in the middle of nowhere, making them easy to find and fix which we will do next. So go about your eroding as instructed. It's going to be awhile so I'll wait patiently as mine erodes as well.
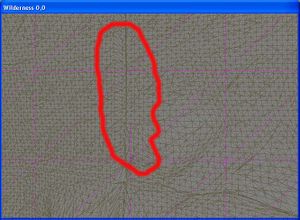
Done? Good.... Now hit file and save, get out of the heightmap editor, and let's see what we have.... In your cell view window hit the world space pull down and select your world's name, you should see a BUNCH of cells pop up. Find cell 0,0 and double click on that to view it in the render window. Select the render window and hit A to bring up the lighting. Everything should look pretty bland right now because nothing is textured in anything but the base texture. Don't worry that is for the next tutorial. What you may notice though is some anomalies on the terrain, Hit W to bring up wirefram mode and you will see it much better.
This is the problems I was talking about with the erosion. By doing it our way we have restricted the anomaly to purely the X/Y main Axis. So now you want to click the 10th tool over from the left (which is the landscaping tool) and make sure soften vertices is checked. Then just quickly run your cursor over the anamoly with the left mouse button down and it will quickly fix it. Using your arrow keys you can quickly move up and down the two Axis to find the problems, takes about 15 minutes total so go ahead and do that and then SAVE you mod (which will take about 5-15 minutes more) and we will move on to creating new start points for your game world. You may get some errors, just hit Yes to All and let it go. There may or may not be a couple of holes in your world. Not that big of a deal, and you could write down every place it thinks it has one, or you could leave it as an easter egg for your players (just kidding, seriously you'll probably find it when you are texturing/landscaping and can fix it then, no need to worry about it now).
Part 4: Are we there yet?!
Almost. Last thing to do is a wee bit of scripting and changes to the base quests in order to give you a nice new start to your new world. By the time we are done you'll be able to create a character completely and start out in the game world... Only one slight problem of course... No stores to buy anything from so you'll be stuck with just the shirt on your back and some shackles left over from that night you were WAY too drunk to remember.
Before I start I need to mention something. I DID NOT come up with this start. It is ripped whole cloth from TheDCProject's Alt Start with MQ cutoff mod. If you want to say how great it is then tell him not me because I had nothing to do with it. If you want to tell someone how bad it sucks then you probably had better tell me because I don't quite think I got it all right, but it is close enough. Enough said on that let's get moving.
First thing, find a nice piece of land. I generally go with 0,0.... it's simple, you know where it is, and it has land where I am. In the left pane of your Object Window you want expand the WorldObjects listing and highlight Static. In the right hand pane scroll ALL the way to the bottom (or hit the button X). You want the last item in the list called XMarker heading, click and drag that into your Render window. It should pop up in your cell view window. Select it there and right click on it, select edit and set the Reference Editor ID to CGPlayerStart.
Now click the last icon all the way right on the toolbar. This is the script editor. Once it opens select File->Open and scroll down until you find the script labelled CharGenQuest and select it to open it up. You want to select everything in there, delete it and replace it with the following:
Scriptname CharGenQuest

short init

short convCount

short warnCount
short hurryCount
short birthsignCount
short birthsignChoice
short tauntCount
short tauntStage
short what
short who
short why
short die
short fate
short tookArmor
short inAmbushBRoom	; set to 1 by trigger zone when player jumps down
                        ; into Ambush B room

short baurusWarn	; Baurus has warned player not to follow
float baurusTime	; used to time Baurus's warnings before Emp is killed

short ambushCount	; how many assassins dead?

short playerKill	; how many assassins has the player killed?

short secretDoor	; set to 1 when Renote triggers secret door

short finalTauntCount 	; used to conditionalize final assassin's speech

; used by conversation scripts to tell whose turn to speak
short speaker
short target
; 1 = Baurus
; 2 = Renote
; 3 = Glenroy
; 4 = Emperor
; 5 = player (as target)

; used to time space between conversation items
float convTimer

; used by idle manager to determine which unique idle to play
short uniqueIdle
; 1 = Halt!
; 2 = Cross arms
; 3 = Point Forward
; 4 = Point Left
; 5 = Point Right
; 6 = Point Up
; 7 = Check Corpse
; 8 = One hand check weapon hilt
; 9 = Look at weapon
; 10 = Follow me!
; 11 = Stay here (point down)
; 12 = Point Up WEAPON
; 13 = Point Forward WEAPON
; 20 = Talk arms crossed
; 21 = Talk hands at side
; 22 = Talk both hands
; 23 = Talk hands at side 2
; 24 = Fist clinched
; 25 = Scan
; 26 = Alerted Scan
; 27 = Hold Up!
; 28 = Exhausted
; 29 = Death scene
; 30 = Death scene loop

; this will be 1 through the duration of chargen quest
short charGenRunning

; set to 1 to see debug messages in chargen
short debug

float fQuestDelayTime	; for quest script timing


begin gamemode

; count down timer
	if convTimer > 0
		set convTimer to convTimer - getSecondsPassed
	endif

; bring up race menu first
if getstage CharacterGen == 0
	setstage characterGen 5
endif

end
Once that is done hit save and then go to Script->New. In the Blank Script that opens copy and paste the following:
scn charGen

short button
short state

Begin OnActivate
end

begin gamemode

if state == 2
	addtopic OrderofTalosTopic
	addtopic UrielSeptimTopic
	return
endif

if state == 0
	messagebox "After a journey too long to remember, you've finally arrived in the kingdom of <Your Kingdom Name Here>.  As the port city of Leyawiin comes into view, you can feel the life you had in Elsweyr drift away.  This is your journey.  This is your life.  You can do with it whatever you wish.  Now that you're starting over, what would you like to change about yourself?", "Edit Race", "Edit Birthsign", "Edit Class", "Finished"
	set state to 1
endif

set button to getbuttonpressed
if button > -1
	if button == 0
		showracemenu
		set state to 0
	elseif button == 1
		showbirthsignmenu
		set state to 0
	elseif button == 2
		showclassmenu
		set state to 0
	else
		set state to 2
	endif
endif

end
Once that is done hit save and then close out of the script window. Now click on the third button from the right on the toolbar, this is your quest editor. You want to find the quest labelled CharacterGen in the left hand pane and select it. Once the right hand side updates the click quest stages and delete all of the stages BUT stage 0 and stage 5, those we need to keep. I personally just delete all of the stages and then re-add those two back in.
For Stage 0 you want to put the following into the Result Script window:
setEssential Renote 0
RenoteRef.kill
setEssential Glenroy 0
GlenroyRef.kill
setEssential UrielSeptim 0
UrielSeptimRef.kill
For Stage 5 you want to put this in the Result Script window:
; in chargen
setinchargen 1
; set quest delay
set charactergen.fQuestDelayTime to .1
player.moveto CGPlayerStart
Also go ahead and make sure you hit Compile Result on each of those stages. I personally don't know if it does anything or not, I just click it because it looks like it needs to be clicked. Ok nearly there. Now you need to click on items in your Object Window, expand it and highlight MiscItem. In the right hand pane you want to right click and hit new. You want the ID to be set to CharGenActiv, and you want to go through the pull down menu next to Script and select the charGen script. Then click Ok.
The list will refresh and it should be the 11th item down in the righthand pane. Just click and drag it into the render window.and then move it till it is underground. Once that is done, we're pretty much finished. Just hit Save, wait for it to do it's thing and then close out of the TS. Start up Oblivion, add your ESP to the list of loaded plugings from the Data option and start a new character. At that point everything should be good to go for you.
While I am sure, with a tutorial this long this can seem like a daunting task, trust me it isn't. From the beginning of writing this tutorial to the end of it I have honestly been doing the exact same things I have been instructing you to step by step and it took a grand total of 3 hours. That included screen shots, formatting etc. The only thing I have left to do is throw this up on the wiki and upload the images and everything will be done inside of 4 hours. Given that in that time we managed to create a piece of land 64x64 cells (which is larger than Cyrodill) that says ALOT about the power of the proper tools. If any of you have any questions or concerns please feel free to let me know and I will do my best. I will answer any questions I can about stuff not covered; however, if things have been covered in either this tutorial or the others I linked to in the beginning please don't feel offended if I refer you to them.
In about two weeks I should have the next tutorial in the series ready to go on Landscaping and regions. I suggest you try some of those out yourself, and if you come across anything you think might be usefull please let me know. Until then I'll leave everyone to their experiments and hope I was able to provide some help.
Thanks to DC, Seven05, and all of the others on the forums that helped me figure out the nuances of the toolset. I couldn't have done this without you guys.
