3ds Max: UV Maps
After having a rather large dilemma concerning my textures and them being exported correctly from 3D Studio Max into NifSkope or the CS, I've decided to write this tutorial, as I've seen really no other good reference on the subject. There are several guides to reskinning and retexturing, but none of them really go into much detail concerning 3D Studio Max or UV maps... That in mind, hopefully you've come to the right place.
| Tools used in this tutorial
Required |
What is a UV map?[edit | edit source]
A UV map is essentially a map that parallels the XYZ plane your model is created on. This tutorial is going to assume that you, at least, have a basic idea of how to model in 3D Studio Max and have created a model you'd like to insert into Oblivion with textures. A UV map is one of the best ways to accomplish this. It is a way to edit the texture of a 3D model in 2D form, then wrap that 2D image back around your 3D model.
How to make a UV map[edit | edit source]
There are, in point of fact, two different ways to make and edit a UV map. One, I consider slightly more advanced, and am only briefly going to make mention of, as there is an excellent tutorial on this method here. This method entails creating a UV map that can be edited in any paint program (paint shop, photo shop, etc) and then reincorporated into your model. For the purposes of this tutorial, we're going to assume you have already found or created a texture you would like to use.
Beginning[edit | edit source]
First, obviously, load the model you wish to texture into 3D Studio Max. I'm using version 8, as it is the best equipped to transfer collision meshes. I am rather certain this tutorial will work fine for versions 7 and 9 as well.
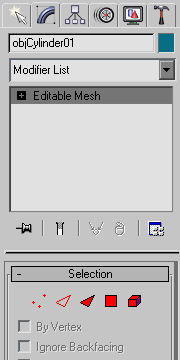
Once you get the model loaded, convert the model to an editable mesh. That being done, click on the "polygon" selection and highlight the polygons you want to apply the mesh to. You can use CTRL to select more than one face. Once you have the faces selected that you wish to texture, navigate to the Material Editor (or press M) and select an empty material sphere. Click the button next to "Diffuse" in the Blinn Basic Parameters rollout. This will pull up a menu to the side, and select "Bitmap". From here, navigate to the texture you wish to use and select it. Apply the texture to the polygons you have selected. You can select the checkered cube to show the texture applied in the viewport.
Using the UV map in 3DS Max[edit | edit source]
Close the material editor and go back to the modify tab on your main screen. Under the modifier list, select "UV Map". This will, nearly always, distort your texture horribly. Don't worry about that. Under parameters, select what shape your model is. If your model is more than one shape, you're going to have to go back and select parts of your model that are one shape, and repeat this tutorial for the parts that are different shapes. Once you've selected what shape it is, your texture should come back into a reasonable shape. Scroll down to the U Tile: function. With the U, V, and W tile functions, you can change how many times your texture gets tiled around your model. Depending on the size of your model, you may need to tile it several times. If you are working on something small (i.e. a weapon or shield), then tiling shouldn't be a problem. Scale the tiling until you get the texture to look how you want it to in game. Then switch back to Create mode at the top of your right menu, select your mesh, and convert it to an editable mesh again. Repeat the process for the rest of your polygons and textures. Save, export, and viola. Congratulations.
