Blender/Custom Cuirass (part 1)
This article has been marked by editors as one needing attention. Please see the Talk page for details. If you can update the article, please do so.
Introduction[edit | edit source]
This tutorial is a step-by-step guide for making a new cuirass in Blender by starting from the game body meshes. This has some limitations, but it also has the advantages that if you use it, you will not have to make new UV maps or weight paint. This is how I got my start with armor modeling, and it works best with a more fitted look, at least until you amass enough experience to push/pull the bodies into basically any shape at all.
Sample results from an unreleased mod work-in-progress (the cuirass is new, the pants are retextured):
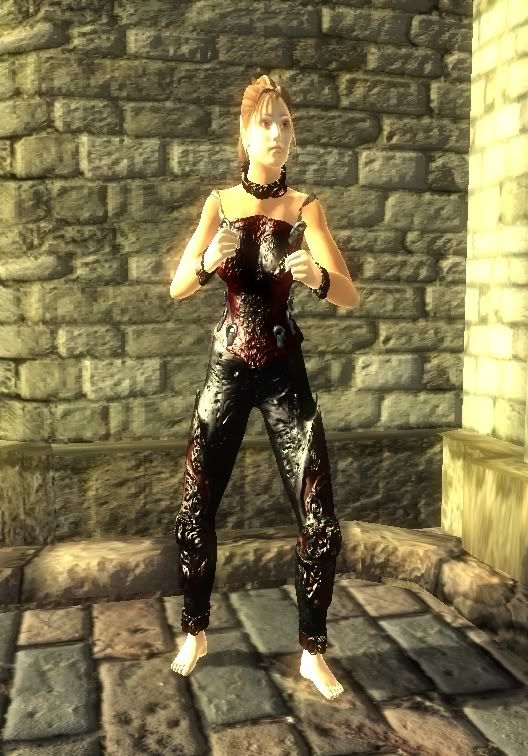
Before you do this tutorial, you need to know the techniques used in my [sword] and [shield] tutorials. I really wouldn’t do this one starting from no modding experience at all, but that’s up to you.
This is not a short tutorial because making armor is not a short process. It’s lots of fun, and the results can be amazing, but if you’re going to do it you need to be prepared to invest some time.
Important Preliminaries: Your Modding Toolbox[edit | edit source]
You will need:
- A BSA unpacker: BSA Unpackers
- The latest version of Blender with the NIF scritps, and a working knowledge of the program. It's complicated.
- NifSkope a powerful NIF editor.
- A graphics editor such as the GIMP. The link for the Blender tutorial page above also has some excellent instructions for GIMP. I use GIMP, and any texture instructions will be specific to that program.
To use GIMP for Oblivion, you'll also need the .dds plugin.
Useful Blender Shortcuts[edit | edit source]
I’ll probably mention these throughout the tutorial, but you can always refer to this section if you forget one (or I do).
- r: rotates the mesh from whatever direction you are viewing it. Use carefully or the results are very odd.
- s: scale the entire mesh up or down by dragging the mouse up or down. Also drags the mesh out of alignment with the axes, especially z, so you’ll want to move it around afterwards.
- ALT-s: shrink or fatten along normals; this may not mean anything to you, but it's actually what you wanted when you chose “s” nine times out of ten.
- r followed by x, y, or z: rotates the selected mesh or vertices on the x, y or z axis.
- s followed by x, y, or z: scales the mesh along an axis.
 If you scale a mesh along an axis in Blender, then you need to apply scale and rotation
 (CTRL-A) afterwards because the NIF format does not support non-uniform scaling.
- g followed by x, y, or z: grab and move selected a mesh or vertices on x, y, or z axis. Again, you can do this without x, y, or z, but you often won't end up with the position you want.
- z: when used in edit mode, makes every vertex visible and the faces transparent. Very useful for selecting hidden vertices from any given angle.
- b: a crosshair appears that you can click and drag to create a rectangular selection box.
- b followed by b: a circle appears that you can scale up or down by rolling the mouse wheel to create a selection area.
- Mouse wheel: hold down and drag to "roll around" the screen and look at the mesh from different angles. Hold down shift/wheel and drag right or left to move right or left only. Scroll mouse wheel up or down to zoom in and out.
- Tab: switch between modes. If you're back and forth between Object and Edit a lot, which you will be, this can be useful.
- w followed by 2 or 3: Used in UV screen. These very useful commands let you snap a row of vertices into a straight line on x or y.
- numpad 7: Moves the camera to a top position, aligned to the x and y axis.
- numpad 1: Moves the camera to a front position, aligned to the x and z axis.
- numpad 3: Moves the camera to a side position, aligned to the y and z axis.
Importing Necessary Body Parts and Skeleton[edit | edit source]
Start out by opening Blender by double-clicking the icon on your desktop. If this is your first time, you’re probably looking at a boring gray grid. If you want it to look different, refer to my Talk page (SickleYield) for a link to some nice themes for Blender. If you see a cube here, press a and then delete. Choose “yes.”
First, import the body. Click on File-Import-Netimmerse/Gamebryo. Now you have a menu showing some directory on your computer. Click around until you’re in your BSA folder of unpacked Oblivion data files (mine is c:\oblivionbsa). Go to data\meshes\characters\_male. Yes, Bethesda put all the female nifs in here, too. Now you should see a long list of nifs. I’ll start with femaleupperbody.nif, because I’m female and my characters usually are, too. If you want to do the male version of your cuirass first, you could use upperbody.nif. Double-click the file and press “Okay” to import it.
You should see a torso floating above the grid in Blender in Object mode (the default mode when you open Blender). There's also an armature below it; if you do not see it clearly then switch to wireframe mode. Click on the armature to highlight it, then delete it.
Repeat this process for femalelowerbody.nif, femalehand.nif, femalefoot.nif, and if you want, also humanhead.nif from the "imperial" folder (not the "_male" one). This should give you a complete body. Don't forget to delete the armature after every import.
Finally, we need a skeleton. For reasons that will be clear later, first select all your meshes: go to Object mode and hit A, or hit it twice, until all your meshes show up pink. Again go to data\meshes\characters\_male and now select "skeleton.nif". However, this time, we only need to import the skeleton. So, before importing the file, go to the settings (click "advanced") and select "Skeleton Only + Parent Selected". Also make sure that "Realign Bones" is enabled.
I recommend that once you’ve gone to this much trouble, you save this as something like femalebody.blend. Then do File-Save As again and save it as mycuirass.blend (or whatever you wish). This way you’ll have a stored version of the body that you can use for future armor projects. I mostly work with Fantasy Figures and Robert's Male Bodies, but I try to keep a version of both sexes of whatever bodies I'm using for this sort of starter purposes. The pictures I'm making are using a smoothed-out version of Fantasy Figures Beta.
Just to recap, at this point you should be looking at your complete male or female body in Blender.
The Torso and Neck Line[edit | edit source]
Right-click on the middle of the female torso to select it. Now go to the dropdown that says Object Mode and switch to Edit Mode. Pressing tab key should also do this. The torso goes from a featureless surface to a network of connected dots, the vertices and faces of the mesh. With the default game topless mesh, the surface is smooth, and you can go straight to making a top out of it. This is why we use the topless one and not the lumpy bra version (that one is far too difficult to model with, at least for me).
If you’re using a different body mesh such as Fantasy Figures, BAB, etc., you might need to shrink the nipples so they don’t stand out and make it obvious this piece is from a body mesh. I've already done this for the pics you've been seeing in order for this to be a more or less all-ages tutorial. Sculpt Mode is your friend for that kind of work, but I'm not going into that for now.
Select a random vertex anywhere on the body by right-clicking it. Press g. Move the mouse around and observe how the vertex is dragged away from the body. You can use g and x, y, or z to drag the vertex on just one axis at a time. This is good, because otherwise you can get odd-looking results from the third dimension that you can’t see. Before you continue with this, I recommend going back to Object Mode, duplicating the torso section (shift-D), and then switching back to Edit. Scale the copy to be a little larger than the body section using ALT+S, not just s. Try to get it to where there is no overlap or clip between the underlying torso and the duplicate that will become your mesh.
You can check the overlap by switching to wireframe mode. Press the z key. You can see different sides of your mesh by pressing numbers on the numpad, or ctrl + any numpad number. If you're scratching your head because your mesh looks like that already and has been driving you crazy, find this button and click it off.
Important Tip: Proportional Editing[edit | edit source]
Here's something much more useful than plain g. At the top of your buttons window, below the 3d window, there is a line of little symbol buttons. If you hover your mouse over them, it should say what they are. One of them looks like a little orange circle. This is the proportional editing button. Click it and choose on.
Pick any random vertex and grab it again. Notice how when you do that, it pulls more than just the one vertex? This lets you smoothly edit parts of the body instead of having to do it vertex by vertex. Also, if you hold the mouse still and move the wheel, you can grow or shrink how much is affected around the vertex you chose. This is ridiculously useful when you're making clothing and armor.
Now you have a body section and a proto-cuirass over it. Select the larger duplicate and make sure you're in Edit Mode.
Now it’s time for the fun part – making your cuirass torso look like a cuirass instead of just like smooth skin. I can’t tell you exactly what to do here, because it will depend on your preferences and art skills, but I’ll give you some suggestions based on my own projects.
Do’s and Don’ts[edit | edit source]
DO NOT:
-Distort vertices too far. This mesh is already weight-painted – it’s already been told which bones it should move with. If you move a vertex from breast level up to head level, it will still move like part of the breast section. And if you stretch a vertex very far from others near it, it will stretch the texture oddly.
-Add new vertices by extrusion. They won’t be part of the weight painting or the UV map and will therefore screw your project royally. This is important because it will affect how your mesh looks with a texture on it, and even whether you can make that texture at all.
-Accidentally make your cuirass intersect the body sections under it. This is known as clipping, and it looks terrible in-game. To help avoid this, make sure you look at every change you make from more than one angle.
DO:
-Subdivide. If you select some vertices adjacent to each other and then go down to the buttons window in Edit Mode, you should be able to see a button that says subdivide. You might need to hunt through a few tabs for it. If you click Subdivide, it will double just the vertices you chose. One square will become four squares, a line of three vertices will become a line of six, and so on. This gives you a way to add more detail than the original mesh leaves room for.
-Use the knife tool. This is wonderful if you want to divide faces only horizontally OR vertically instead of both at once (like subdivide does). You can access it by pressing SHIFT + k. You can then choose a mode; I usually use midpoint, but feel free to experiment. You use it by left-clicking outside the area you want, then dragging across the area like this and pressing enter. When used horizontally, the result is something like this.
-Mold the edges. Subdivide or knife cut around the armholes, neckline, and hem to make an extra row of vertices. Grab the very outer rim of vertices and pull them back into the body mesh so that your cuirass has obvious, three-dimensional edges. This is an optional technique which is not used in some prominent mods, including much of the BAB clothing and armor. Unless you're already really good with alpha channels and super-detailed texturing the way the BAB team is, molded edges are a better way to make your cuirass look solid and real instead of like a layer of paper over the body.
Tips and Techniques[edit | edit source]
-Bear in mind whether or not you want to add pauldrons (details below). If so, don’t add a lot of decoration in the shoulder region.
-If you plan to include the upperbody section under the cuirass as part of it, you can show skin underneath. This is why I had you copy it. This way you can have different necklines by cutting off vertices, or you can have open sides that are closed with decorative fasteners (something I enjoy doing with my cuirasses). I’m not promoting skimpy armor – I try to always have mine cover the important organs and so on – but it’s a valid technique for making your cuirass actually look like it was made from pieces of skin sewed together, different bits of shell or metal, or et cetera.
-Remember, collar and hemline variations help to distinguish your cuirass from the plain old body mesh. Experiment with subdivision and grabbing to create new hem shapes, a mandarin collar, etc. For parts of the cuirass that need to have an “inside” showing, you can easily make that happen in NifSkope. I'll show you how down in the export section of Part 2.
-Don’t forget to export the UV map of this section when you’re finished. Switch to UV Face Select Mode. Go to UVs-Scripts-save UV face layout. Here's a picture. A screen will pop up that allows you to choose the directory in which to save a .tga of the UV map. It doesn't matter where you put it, as long as you can find it later. They're not hard to locate, since the names are generally rather odd-looking. You can use this layout to make a new texture that fits your mesh.
Helpful warning: Occasionally in Blender I've seen a glitch wherein Blender outputs a blank .tga file with nothing in it instead of the real UV map. If that happens, you need to change this so that the object button is NOT selected. Then pick your own name for the output file.
Continued in Custom Cuirass in Blender Part 2: Other parts of the cuirass, and how to export all of this.