Using Kits and Navigating the Render Window
This article is a Featured Article. This means that it has been found to be among the best articles on the Wiki, and that it may serve as an excellent example of what articles should strive for.
TESIV dungeons are assembled using modular kits created by artists. A typical kit consists of a variety of walls, halls, and other structural elements that snap together seamlessly. For this dungeon, we're going to use Istvan Pely's Cave kit.
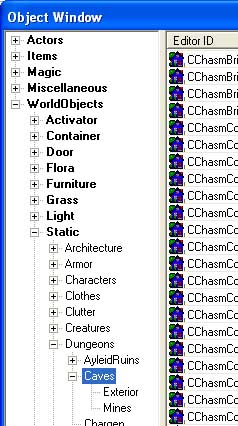
We're now ready to begin using the Object Window. This window is the toolbox from which we'll pull all the monsters, architecture, objects, and just about anything else we need while building with the CS. To access the Cave kit, expand the Object Window list as shown in the image.
Notice the list of objects now filling the right field of the Object Window. This is the cave kit. There are two important things to point out about how these objects are named.
- Prefix
- Within the Kit are contained smaller sets of objects that snap together. For example, "CSRmCornerIn01A" and "CSRmWall01A" are both used when building small rooms.
- Suffix
- The Cave pieces have a special restriction - they cannot be rotated, because of the way the texture tiles. To make selecting the right piece easier, non-rotatable pieces end in A,B,C, and D. So, when building a large room, both "CRmWall01A" and "CRmWall03A" can be used on the same wall.
It takes time and experimentation to learn the naming conventions used by different artists; especially when you can't ask the artist directly. Be patient and study how the pieces are designed; you'll have it figured out in no time.
Cave Set Key:
C = Cave, N = Narrow, Rm = Room, S = Small, W = Wide, Trans = Transition Piece
So, for example CSRm = Cave Small Room, CWHall = Cave Wide Hall Etc...
So, let's place some objects down. Drag the following pieces from your Object Window to the Render Window.
- CRmCornerInExitN01B
- CRmCornerInside01A
- CRmCornerInside01C
- CRmCornerInside02D
- CRmExitWide01D
- CRmWall01B
- CWEntrance01A
Too Dark to see? Press "A" to toggle lighting preview on and off.
We've now got the pieces needed to build our first room, but let's learn how to get around in the Render window first.
[edit | edit source]
For more information go to the Render Window Page
There are a few important navigation keys to remember:
- Shift
- Hold shift and move the mouse to rotate your viewpoint. With no objects selected (click the void to de-select) you will rotate in place, and with an object selected, you will rotate around that object.
- Middle Mouse (or Space Bar)
- Hold the middle mouse button and move your mouse to pan around the viewport
- Mouse Wheel
- scroll for quick zoom in/out
- V
- hold V and slide the mouse forward/backward to zoom. This is good for fine-tuning your viewpoint.
- C
- Press to Zoom to the selected object(s). If you ever get 'lost', and cannot see anything in your Render Window, this is usually the quickest way to regain sanity. Note that double-clicking an object in the Cell View will also select and automatically zoom in on the object.
- T
- Press to get a top-down view. If you have any objects selected, it will zoom to them.
Take some time to get used to moving around the Render Window. Go ahead and take your time; I'll wait.
Now let's learn to manipulate our pieces. Select a piece by left-clicking on it. Hold the mouse button down and you can drag the object around. Notice that the object only moves on a horizontal plane. This is called the XY plane. To move the piece along a different axis, hold the X,Y, or Z key while moving the object.
Rotating is very similar. Click and hold with the right mouse button to rotate. Axis constraints are handled the same way in rotation mode. (But remember! We cannot rotate these pieces! ctrl-Z to undo unwanted rotations)
You can also scale objects by holding the "S" key while manipulating the object. Scaling should only be done sparingly, and when you know exactly what you're trying to do.
Position, Rotation, Scale, and other properties can be adjusted manually through the reference window as well. We'll discuss this window in more detail later.
One very important aspect of working with kits is snapping. The grid snap and rotation snap buttons are in the CS toolbar, and highlighted in this image:
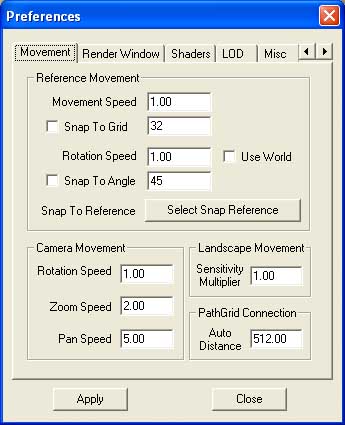
Good snap settings are crucial to avoiding errors and making efficient use of kits. To adjust your snap settings, right click in the void of the render window and choose "Render Window Properties", or navigate to "Preferences" under "File" in the CS toolbar, and selecting the "Movement" Tab.
Important for your sanity : Set Rotation Speed, Zoom Speed, and Pan Speed under Preferences under the File menu. Faster settings for large projects. Slower settings for detail work.
These default settings are ideal for working with the Cave kit, but can be adjusted to your personal preferences.
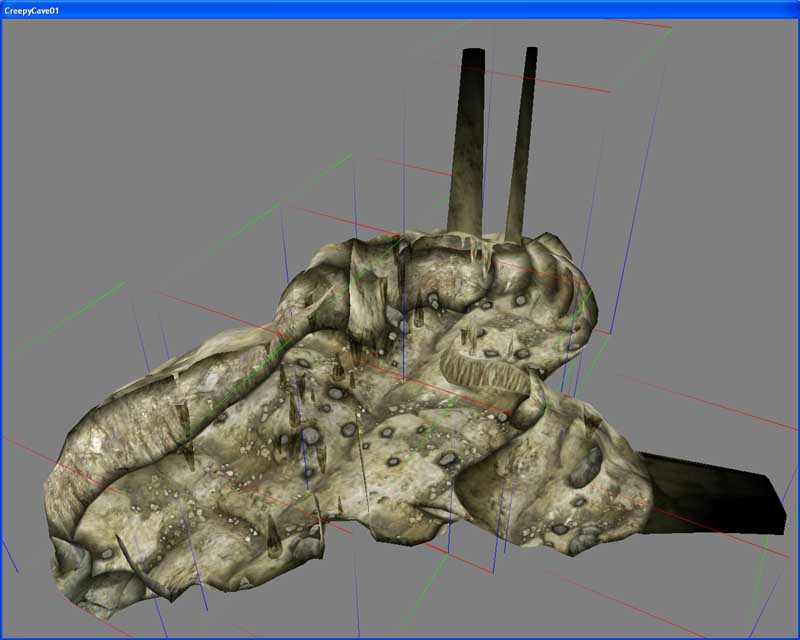
Armed with this knowledge, turn on grid snapping and arrange the pieces we dragged into the Render Window earlier to assemble your first room. If the pieces don't line up correctly, double click each object to open the Reference window and change the "Z" value to the same number on each object. Your final result should look something like this:
Perspective view of the entry section
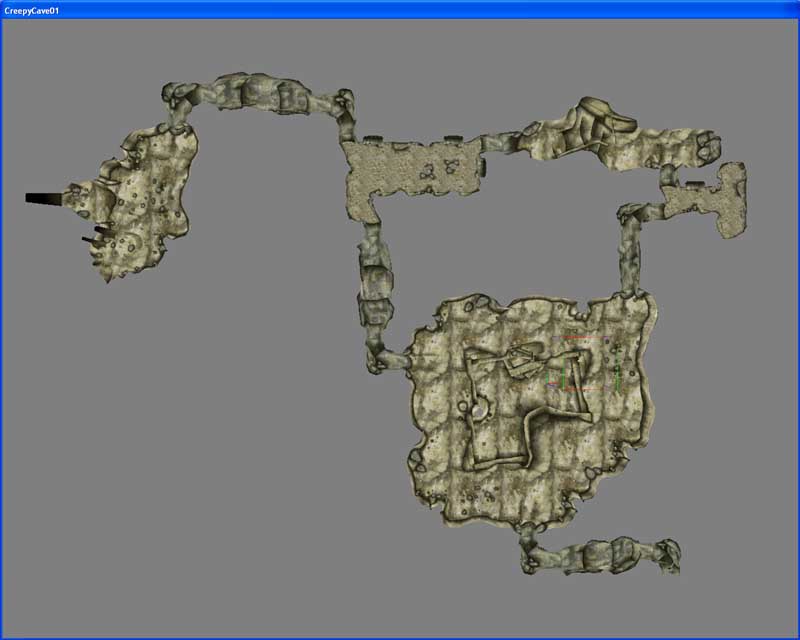
Top view of final dungeon
Let's flesh our dungeon out a little bit:


