Develop Your Dungeon and Clutter
(Back to Using Kits and Navigating the Render Window)
Developing your Dungeon[edit | edit source]
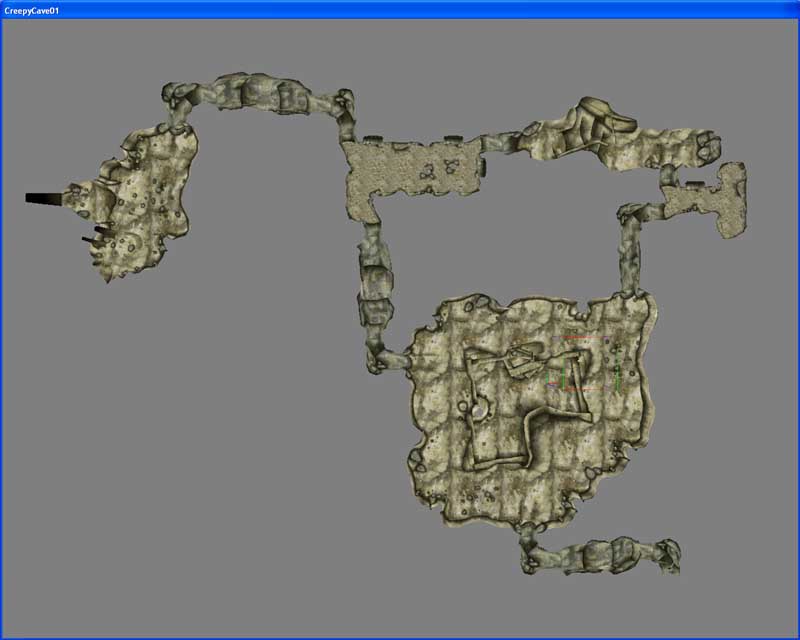
The next step of the tutorial asks you to complete the layout of this first dungeon cell, and you'll only be given a screenshot of the final layout as a guide. There is a reason for this. You're going to have to use what you learned on the last page and expand upon it to do so. Learning to manipulate the kit can be a slow, frustrating process, but be patient. I'd recommend spending a few hours just experimenting with the kit before moving on. You'll get very fast once you've learned the functionality of the pieces.
Let's add a few more rooms. Using the cave set, re-create a similar layout to the one pictured here:
Be mindful of where your dungeon is located in the exterior world. A dungeon on flat land probably should never ascend. Likewise, a dungeon in a mountainside can go up or down, but not wrap around the entrance.
CS automatically backs your plugin up in case of an unexpected crash. You can set the frequency of auto-save under preferences(File/Preferences/Misc-Tab). Auto-saves are automatically saved to your Oblivion/Data/backup directory. Just change the file extension to .esp and replace the outdated file in Oblivion/Data. It's still always a good idea to save frequently!
Clutter[edit | edit source]
Let's visually populate the dungeon with some clutter. Bandit caves are a personal favorite of mine, so I'll treat this cave like a hidden robber's den, and choose appopriate clutter items to support that theme.
Remember navigating to the cave pieces in your Object Window? Load up the Dungeons pieces now (of which the cave pieces are a sub-set). You could also load up all of Static, which displays all static pieces, but can slow down performance.
If the objects in your window are not listed alphabetically, click "Editor ID" to re-order the list. This can be used to order lists by other headings as well.
Scroll down to objects with the "DUN" prefix (dungeon>Misc), or tap in those letters with any object in the Object Window selected. This is a basic set of clutter created for generic dungeon clutter.
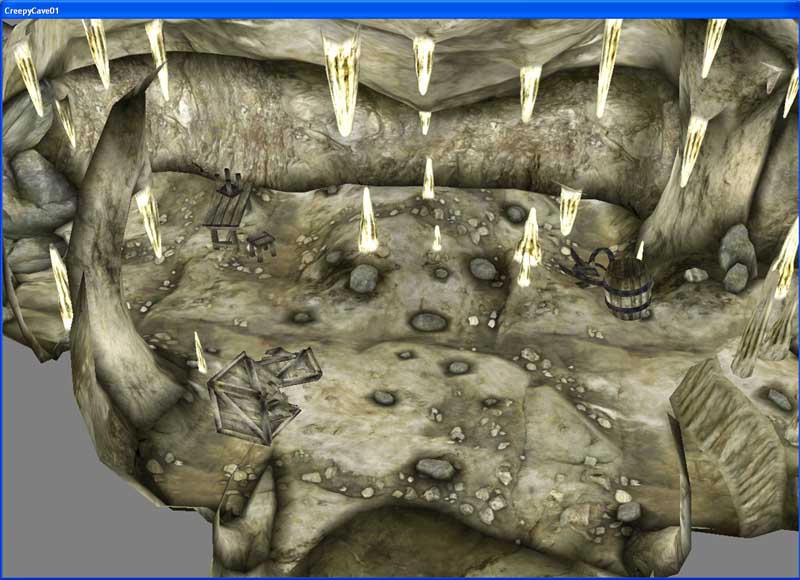
Let's start at the start. Maneuver your viewpoint in the Render window to focus on the first room we built. Logically, we'll assume that the bandits use this room as a guard post, as well as a dumping place for some of their trash. Drag some broken crates and furniture out into the render window and arrange them using the controls we learned earlier. Turn snapping off to fine-tune your placement. You can also adjust your rotation and movement speeds in the preferences tab we saw earlier, though this is only neccessary for the finest of adjustments.
Use the "F" hotkey to force an item to the ground. It will snap to the nearest collision surface beneath itself. This is useful for quick and dirty placement, but generally needs to be adjusted manually. Note that using this hotkey with multiple objects selected can be unstable. Save often!
Many of the surfaces in the Cave set are uneven. As a result, you'll often have to 'sink' objects into the ground. You'll rarely be able to settle an object perfectly, so just do your best, and go with what looks best to you.
This is a good density of clutter. Think of how the player's eye will move around the space as they enter - which will be affected by things such as lighting, enemies, and loot placement, which we'll get to soon. The table is the most interesting thing here, and it guides the player's attention to the left, which is also the direction of the only exit deeper in the dungeon.
Let's think of ways to clutter the remaining rooms. Using my layout pictured above (yours may vary), I've come up with a list of room themes, and also some static items to use in them.
- Food Storage & Prep Room
- FireLogPile01
- CookingPot
- CookingFirePLank01
- Weapons Training Room
- TargetHay01
- ArenaHeavyBag01
- Big Camp Area
- Tent01
- DunPlatform (this is great for creating a level surface)
- BurntRubblePile01
Take a while and clutter the rooms up as you like them. Stick with static objects for now. Here are some other useful all-purpose clutter pieces:
- MPlankWall01
- WeaponRackWide01
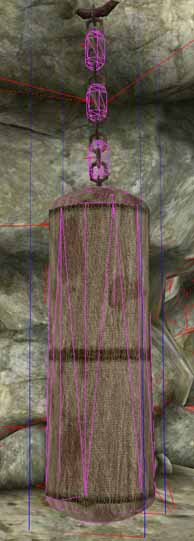
A note on placing items with Havok physics - use the "F4" hotkey to toggle collision geometry wireframes while working. Purple wireframes indicate Havok collision. Avoid penetrating these wireframes with static geometry to avoid errors.
When you've lightly cluttered the dungeon, we'll move on to some special objects outside of the statics. Containers, doors, Havok objects, and Enemy Placement


