World Space: Modifying the Landscape
Now we've got our World Space, so let's put in a little bit of land (after all, melting on an endless sea of lava isn't my idea of fun). It is presumed you've also done the Basic Landscaping Tutorial. If not, refer to it for instructions on how to change the landscape.
Now, select your World Space in the 'Cell View' window and double click on the sole cell shown in the window (Wilderness 0,0). The purple on your render window represents the water you chose for your world space, in my case, lava. Looking around, you'll notice that all the land is underneath the water layer (0 units on the Z axis), and that is not very helpful to the poor player in the middle of our fiery sea.
Bring the landscape up above the lava layer so that the player isn't stuck dying in lava. Once the land is a bit above the lava layer, set the radius to 15 and choose the flatten vertical tool to flatten the land within a large zone. You'll see why in a minute.
Is the land taking a long time to reach above the lava? Increase the 'Land Sensitivity Multiplier' in your CS Preferences to about 5.00.
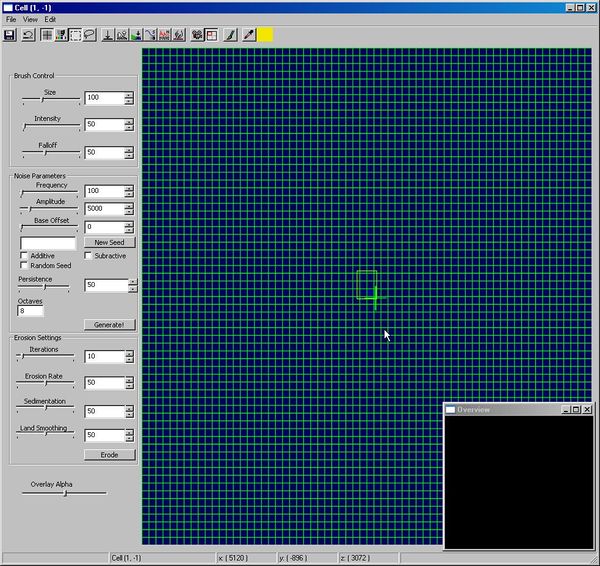
Alright, click on the 'world' tab and select the 'Heightmap Editor' or click on the globe symbol next to the landscape editor on the toolbar representing the heightmap editor. When asked which World Space to edit, choose yours (ex: MyOblivionPlaneWorld).
The heightmap editor can perform several tasks. Among them are editing the landscape (which we are about to do), generating a landscape, generating a LOD for a landscape (so we can see it from a distance), or we can simply use it as a map.
Take your time at gettingediting used to this tool. Always save before doing anything with this tool, either to prevent crashing, or a major mistake. The only things we need to worry about for the purpose of the tutorial are the following:
- Gridleditingines: The tool at the top showing a grid. This tool shows a grid overtop the map. Useful for limiting your plug-in size.
- Marquee/lasso: Use this to make sure that you do not edit outside of the selected area.
- Raise Land: Displayed as an icon with a mountain and an arrow pointing upwards. Raises the land, parameters decided by 'Brush Control' (see below).
- Lower Land: Displayed as a river in a valley with an arrow pointing downwards. Lowers the land, parameters decided by 'Brush Control' (see below).
- Brush: Displayed as a paintbrush. Used for 'pasting' the selected colour of pixels within the radius determined by 'Brush Control' (see below)
- Dropper: Select a pixel underneath the dropper to select the land height. Select the brush to then paste the same colour of pixels within the brush.
- Brush Control: Use this to set the parameters for the tools you use in the editor. Size, Intensity, and Falloff % are controlled here.
Do you see the area where the map is a different colour than the rest? That is the land we raised above sea-level earlier. Now, because this is only a tutorial, and dressing the land takes a fair amount of time, we will make this plane of Oblivion a small one. Enable the gridlines and use the marquee to select that area so that approximately 3 cells by 3 cells are selected. This area will be where our land is going to be.
Now, select the dropper tool and click on the land we modified. The box to the right of the dropper should change colour to match what colour our land is represented by. Click on the brush and start painting a landscape with two islands.
The colour you are currently painting represents the land (presumably) just above the water line. You can change the brush radius in the Brush control options.
Once you like the shapes of your islands, save the shape of the land to your plug-in file (the disk icon, or 'File' save, or alt-s) then save the plug-in. We've now got our basic land shape. Soften around the edges of the land after double clicking the cell at 0,0. Do this for all your islands then we're ready to move on.
From here on in the tutorial, it is recommended make your minor adjustments for rocks, rough surfaces, hills, etc... using the landscape editor.
