Containers, doors, Havok objects, and Enemy Placement
(Back to Develop Your Dungeon and Clutter)
Containers[edit | edit source]
Containers are special objects that other objects can be stored in. TES IV ships with many containers that are made just for different types of dungeons. Like most objects in the CS, they are organized for easy access.
In your Object Window, under the "WorldObjects" heading and above the "Static" Heading, select the "Containers" section. Sort the list alphabetically and navigate to objects with the "DungBandit" heading. These containers have been set up to generate random loot based on character level. Containers with the word "boss" in the ID generally are much more likely to generate very good loot. Despite temptation, use these sparingly, and only after an appropriate challenge.
Loot is to players what cheese is to rats. It is one of your most powerful tools to guide the player through a dungeon. Drag some and place them with your clutter in the dungeon now. Be sure to place food containers where they are most appropriate (near tents, tables, and cooking areas), and place healing containers where you expect them to be most useful to the player. (we'll re-visit this when we place enemies). Try to place containers where they make visual sense. A lone chest in the middle of a floor doesn't make much sense, unless it's intentionally placed there for some purpose, such as luring players into a trap. (more on traps later!)
Don't over-saturate the dungeon with loot containers. An average-sized room that is not themed as a storage area usually should contain 1-3 loot containers, and often you'll want one or two of those to be 'junk' loot. If you place great stuff everywhere, it diminishes the effect of loot in general. Storage areas usually should have several containers, but typically all junk.
The "Dung" prefix loot containers are made especially for dungeons, not just in terms of what they contain, but also how they look. Resist the temptation to use common containers in dungeons, as they are textured darker, for more brightly lit environments. If you really need, you can create your own containers using our existing assets, just be sure you know what you're doing first.
Containers are a great candidate to scale in order to achieve more visual variety. Just remember a simple rule of thumb - Most objects don't look good less than half, or more than double, their original size.
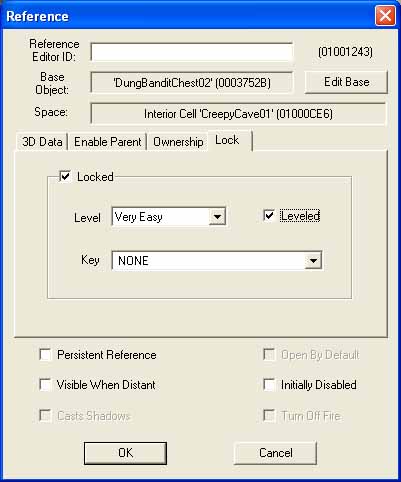
Lock one or two of your chests. To do this, double-click on the chest you want to lock to bring up the Reference Window. Select the "Lock" tab. In general, you want to set the lock level to "Easy" or "Very Easy", unless there's a key available and/or you want only players focusing on lockpicking to be able to open the chest. The same rules apply to chests with valuable contents. Locks get harder with player level, not security skill, so a level 30 warrior with a 5 in security will see the same lock as a level 30 thief with a security skill of 80.
Doors[edit | edit source]
Navigate to the "Door" section of your Object Window. Drag "CDoor01" out and use that for your entrance door, and then position "CDoor02". We'll link these to other cells later in the tutorial.
For a more detailed tutorial on working with "teleport", or linked doors, view This brief tutorial Submitted by a wiki user!
Havok Objects[edit | edit source]
Many of the objects in the world of TESIV are not static and can be thrown around under the havok physics system. These include ingredients, armor, clothing, weapons, books, and all sorts of useless clutter. Most of these are found under the "Items" category in your Object Window. Experiment with what's available and pull some items out to clutter the world with. Most of what you'll like to use is categorized under "Misc Objects".
Arrange some items on the table we placed in the first room. I used the following:
- Apple
- CheeseWheel
- WeapIronDagger
- LowerClassBowl01
- LowerClassMug01
- Gold001 (scatter a couple of these around, but don't stack them)
Now, select all the items and toggle havok simulation on. This is a button in the toolbar, highlighted in the image below. This process is called "settling" and makes it very easy to scatter objects around. Try it in various situations and then hand-tweak items for the best effect.

Try this handy trick when adjusting the placement of havok-enabled objects. Turn havok simulation on, and select an object. Now hold alt+ctrl on your keyboard and drag the object around. This is similar to the "grab" function in-game
Enemy Placement[edit | edit source]
Now for one of the fun parts. Let's put some baddies in here for the player to trounce. We're going to use Leveled Creature lists to populate the dungeon. Just like containers, TESIV ships with several pre-created lists just for bandit dungeons. Expand the "Actors" category in your Object Window, and select LeveledCreatures. Navigate down to the "LL2BanditCaves" lists. Notice the numbers at the end of the list? Those indicate the percent chance that the list will generate an enemy when the cell is loaded. It's good to use partial-chance lists to vary to player's experience when visiting the dungeon.
Note that a list which doesn't generate an enemy will have another chance when the cell is loaded again. Once a list generates an enemy, it will not do so again until the cell resets (which takes around 3 in-game days).
"LL2" lists generate bandits as well as 'junk' animals, such as rats. This is also to create more variety for the player experience. The bandits generated will be within range of the player's level, making the dungeon fun at any point in the game for any player.
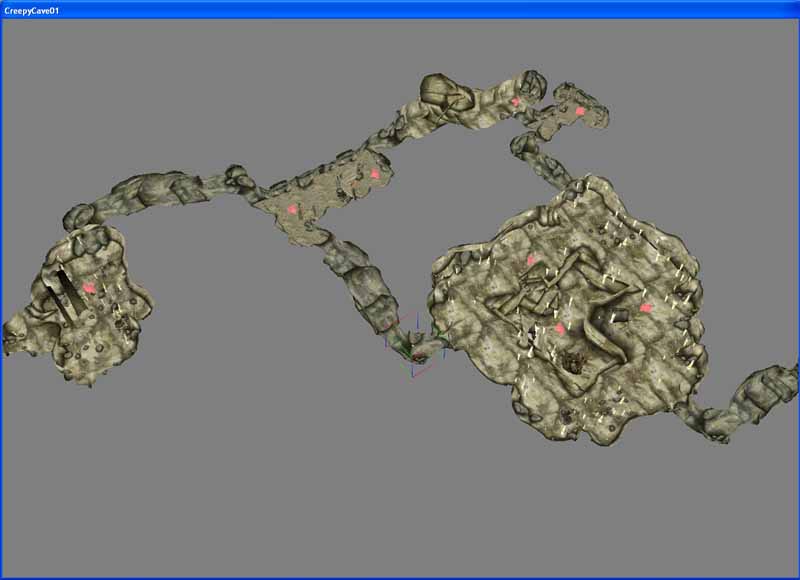
Let's avoid over-populating the dungeon. Always plan on every list generating the most difficult enemy it can, to avoid overwhelming the player. (Then plan on the partial chance lists not generating any enemy! Always bear in mind the two extremes) One or two lists are plenty per small room, and two or three should do well for the large room. Don't bother placing enemies in hallways; They aren't fun places to fight. Remember that enemies may not appear exactly where you placed the list in the CS - the game places them nearby, and the bandits being generated are already to configured to explore their surroundings in a small radius.
Refer to this image for a good enemy distribution.
Let's move on and place some more items in our cell. Furniture, Traps, and Lighting

