[dismiss]
This wiki is a copy of the original Oblivion CS wiki created and maintained by the UESP.net. See CSwiki:Copy Notice for more info.
Texture Replacer/Tutorial
(Redirected from TR: Retexturing Made Easy)
Jump to navigation
Jump to search
| Tools used in this tutorial
Required
|
This is a tutorial demonstrating how to use the Windows GUI of Texture Replacer ("TR").
Tools used for this tutorial:
- TR Retexturing Tool - Obviously
- BSA Commander - To unpack the BSA-Files
- Adobe Photoshop with the DDS Plugins - To edit the textures.
- (Of course you can use any other program capable of saving in dds-format, like GIMP for example.)
Recommended:
- Windows Texture Viewer - (WTV is a lot faster than Photoshop when you just want to view textures.)
1. Extract the original NIF from the BSA-File[edit | edit source]
- Install BSA Commander and doubleclick on Oblivion - Meshes.bsa It's located in your Oblivion Data folder. Click on "Unpack". Select a folder where you want to store your original textures then click on "Unpack" again.
- You also need to extract Oblivion - Textures - Compressed.bsa - those are the original textures you will use as templates for creating new textures.
2. Make a copy of the NIF file you want to retexture[edit | edit source]
- Best create a new folder for all models that belong to your mod and copy the models you want to retexture in there, you can rename them if you like but you don't need to as long as you use a new folder and not the one the NIF was originally in.
- For this tutorial we use a copy of Oblivion\Data\meshes\clutter\signs\signtwosisterslodge.nif
3. Open the NIF file with TR[edit | edit source]
- (You should get TR now, if you haven't already.)
- Either use "open with" in the context menu, or start TR and browse for your NIF file. In the context menu's "open with" dialogue you can also set TR to be the program that is used to open NIF files when you doubleclick them.
4. Now TR scans the model for textures and displays them[edit | edit source]
5. Search for those textures and look at them to find out which one to modify[edit | edit source]
- Open the folder where you've extracted the original textures to, and have a look at the textures that are used by the model, most objects use only one texture, but this one uses 3 of them.
- File:Tr1a.jpg
- We want to modify the sign, not the frame, so only the second texture is relevant.
6. Creativity time...[edit | edit source]
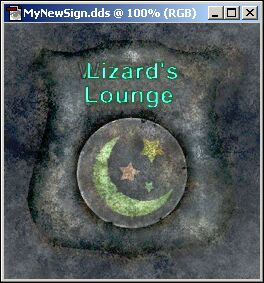
- This is the moment where you have to learn how to use Gimp, Photoshop, PSP or whatever other image-editing program you're using. This could be the result of your work:
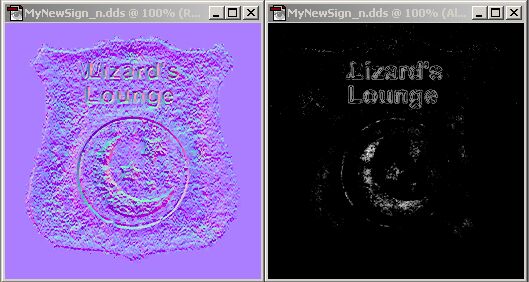
- Oblivion textures always come in pairs: texture.dds the color-texture (defining how the surface is colored) and texture_n.dds the normal map (defining surface structure). Now that we made a new texture, we also need to have a look on the normal map (RGB-channel and alpha channel).
- Fiddle around a bit with the normal map filters and use copy/paste to create a normal map out of the new texture that looks similar to the original one. (see also: Normal Maps Basics)
- That's it. Save the texture as DXT1-dds and the normal map as DXT3-dds into a new folder
(here: Oblivion\data\Textures\Mymod\) and continue with modifying the NIF file.
7. Go back to TR and select the texture you want to change (using the mouse or up/down keys)[edit | edit source]
8. Press enter or doubleclick to edit this entry[edit | edit source]
9. Either type in the new texture name or browse for the texture using the "..." button[edit | edit source]
10. After pressing enter (or the "v" button) your model is retextured.[edit | edit source]
11. Close TR and add your new model to the game[edit | edit source]
- Create a new object in the Construction Set or make a copy of an existing one, then click on the Button that has the name of a NIF-file (when you made a copy) or is named "Add NIF File" (when you made a new object) and select your retextured model.
12. Adding your new model to the world[edit | edit source]
- (You should already know how to do this before you start retexturing. If you don't know how to add objects to the world, then now might be a good time to read the Beginner's guide.)
- Drag & drop the object from the Object Window into the Render window and have a look at the result of your work:

