First Steps
First Steps[edit | edit source]
Start up the CS. When it's booted, go to File>Data from the menu bar. Double-click "Oblivion.esm" and click "OK" to load the Oblivion master file.
If you choose to load any additional files, do not set them as your active file.
Always set the plugin you are making changes to as the active file.
When you load with no active file, the CS will prompt you to create a new one the first time you save.
Depending on your PC's configuration, it may take a while to load. Now would be a good time to get a beverage.
Once the CS has loaded up, several windows will populate your screen. The first of these we are concerned with is the "Cell View" window. The major features of this window are World Space, Cell list, and Object List.
- World Space
- This drop down allows you to choose which world space you're working in. For now, we want to work with interiors, which is the default selection.
- Cell List
- These are all the cells contained within the world space, listed by Editor ID.
- Object List
- This is a list of all objects contained within the selected cell.
If any windows are not visible when you load, use the "View" menu in the CS toolbar to see if they are hidden or not.
Cell View
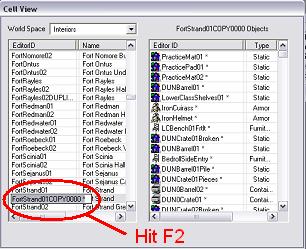
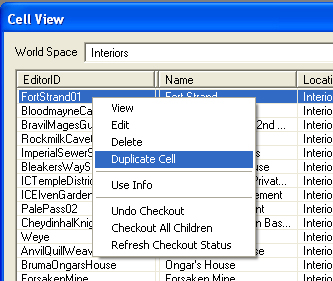
The easiest way to create a new cell is to duplicate an existing one. In this example, I'm using FortStrand01, but you can use anything. To do this, right-click on any cell, and choose "Duplicate Cell". Go ahead and rename your new cell by clicking on the Editor ID and pressing F2. Let's call this cell CreepyCave01 for now.

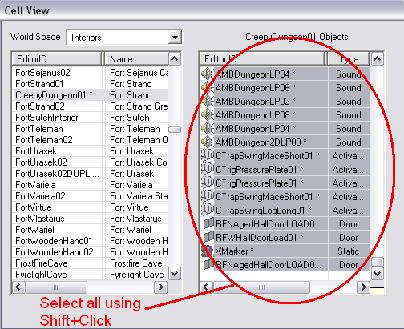
Double-click your new cell to load it. Once you're sure you've got the new cell loaded (it's not FortStrand02 - it's got the word COPY in it), we'll delete all the old objects so we can start from scratch. In your Cell View under Objects, select the first item, and press the shift and endkeys on your keyboard to quickly select all objects in the cell. A quick stroke of the delete key, and you've got a clean canvas to work with.

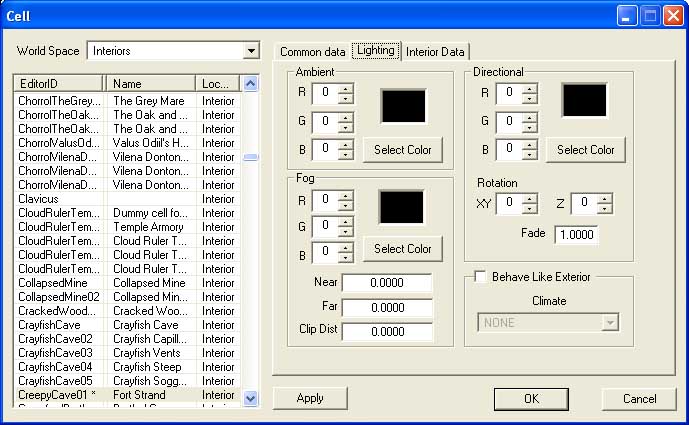
Before we start on the layout, we have a little more prep work to do. Right-click on CreepyCave01 in the Cell List and select "edit". This view lets us quickly view some basic properties of the cells in our current worldspace, and has three tabs.
- Common Data
- In this tab, we want to restrict fast travel, and set the music type to "Dungeon". You can also toggle water on/off here and set the Z-height of it, as well as choose the water type. The "Hand Changed" check box is useful for exterior cells that have been edited and should not be affected by procedural generation.
- Lighting
- You may note Ambient and Fog values are greyed-out (disabled). If this is the case, be sure the "Behave Like Exterior" checkbox is *not* checked (clear). Now we want to set the ambient light and fog levels. For dungeons, good RGB values for light are between 20 and 25, and fog between 25 and 30. Also, under fog; set "Far" and "Clip Dist" to 3,000 (3000.0000). When in doubt, try looking at the settings in other dungeons and copying those. Remember that dungeons should be generally darker than public areas, but still visible without a torch(but if you want them to be realistic they should only be visible with torch or light spell). Also remember that your dungeon will be brighter and darker on other monitors besides your own.
- Interior Data
- Here we set the name as it will appear in-game. Change it to "Creepy Cave" for now. For our dungeon, leave all other boxes in this tab blank or unchecked.
Note that when you duplicate a cell, the lighting information is cleared, and you will have to set it manually.
Now that we've got the basics taken care of, we'll start actually assembling our dungeon.
Using Building Blocks and Navigating the Render Window

